|

Good Housekeeping
|
So, now you
have all your lovely downloads, how do you manage to organise
them?
 You
will find several hints and tips here on file management and general
game organisation which I have learned in my years of simming.
Many of these ideas I would not know without the kindness and
openness of many other simmers, some gone and some still helping
simmers along in their day-to-day forumming and my hope is that
you will pass any useful information on yourself when you come
across someone needing help. You
will find several hints and tips here on file management and general
game organisation which I have learned in my years of simming.
Many of these ideas I would not know without the kindness and
openness of many other simmers, some gone and some still helping
simmers along in their day-to-day forumming and my hope is that
you will pass any useful information on yourself when you come
across someone needing help.
This page
is more about preventing problems from occuring in your game than
troubleshooting existing problems. If you have a particular game
problem, you may find the answer (or a link to your answer) on
my Downloading
Without Tears page. I hope you find something of use here,
and please do check the links I give for further information,
hints and tips for general gameplay, safe downloading and good
housekeeping.
|
|
 |
|
I am in no
way implying that these hints, cheats, tips, fixes or links below
are the definitive and only ways of helping you organise your
items with the minimum of problems, only that these are the ways
I (or other simmers I know) have found most effective. I am sorry
but I cannot give additional help if things go wrong as a consequence
of using any of the information here. What I know I freely share,
however, in good faith. But do please check out the links where
given to compare and contrast methods.
Please note
that although I am a Mac user, I only have Sims stuff on my PC,
and while I know that certain procedures, filenames, etc are very
different on a Mac, I cannot give any technical help for Mac Simmers,
unfortunately. But if you use Google, I am sure you will find
what you need - and probably much better than any help I could
give anyway.
Finally, a
dire warning. Some of the hints and tips below may involve you
altering a downloaded object in some way. Before altering any
object, make a copy first. You never know whether it will be available
for download again. I cannot urge you enough to do this! Sims
1 sites are disappearing quicker than hot dogs at a barbeque and
not all are file-share friendly. Back up all your downloads regularly,
preferably onto a CD or DVD. Protect your investment. You know
it makes sense.
|
 |
 |
Bunny's
Best Links throughout this page list just some of the
best places to get help when organising our game! This is
where the Sims Community comes into its own - people having
problems, asking questions and sharing what they learned,
whether on forums, in chat rooms or on sites of their own.
This game of ours may drive us crazy at times, but, it has
also brought many diverse people from across the globe together
to share experiences, joys and frustrations, both with our
sims lives and our own lives. Best of all, it has helped
forge real and lasting relationships with people from all
walks of life with whom we were otherwise highly unlikely
to ever meet.
Long
may it last!
|
|
|
 The
Bunny Wuffles Troubleshooting Kit includes some of
the essential help utilities mentioned on this page. Download
this at the Winzip symbol: The
Bunny Wuffles Troubleshooting Kit includes some of
the essential help utilities mentioned on this page. Download
this at the Winzip symbol:
Please
note that all of these have either been included with previous
permissions, are freely shareable or archive files from
OldVersion.
Where I mention files you need or should have that are not
shareable, I provide links to the site where you can obtain
them from.
|

|
|
 Watch
out for Lil' Sad Housekeeper Wuffles! She will tell you if there
is anything more to read on a particular subject at my Downloading
Without Tears page. Click on her and she will take you there in
a new window. Watch
out for Lil' Sad Housekeeper Wuffles! She will tell you if there
is anything more to read on a particular subject at my Downloading
Without Tears page. Click on her and she will take you there in
a new window. |
|
|
 |
|
While my old
TSR label "computer wuss" can still at times be applied
successfully to me, there are certain organisational issues I
have come across which I have solved either by myself (yay! go
me!) or (very likely) with the aid of others. Below is a list
of some of those problems with my suggested solutions, links for
further reading and, where applicable, even essential files which
you should keep in a safe place "just in case".
I hope you
find this page useful for those times you feel like uninstalling
The Sims and sticking to Minesweeper instead. Scroll down to see
them all or use the shortcuts below to jump to a specific point:
|
|
|
 |
|
Using
and creating folders becomes an essential skill for the avid downloader.
For instance, it is a good idea to organise your objects into
separate folders for several reasons:
- You can
find things easier when (not if!) you need to
- You will
optimise game loading time considerably
- You will
increase game stability
- You can
easily organise your neighbourhoods or lots into seasonal or
other themes
The good news
is that organising your objects, walls and floors within folders
will not mess up your game, and I will walk you through what to
do later in this section.
Don't
worry if you have never had to find folders on your desktop before.
It is easy as this:
- Close down
your sims game. Never try to do this while the game is running.
- Click on
your "Start" menu icon.
- Double
click on "My Computer" which brings up a new window.
- Double
click on "C" which brings up a new window.
- Double
click on the folder called "Program Files"
- Double
click on the folder called "Maxis"
- The same
for the folder called "The Sims"
- The same
for "GameData"
- Then "UserObjects"
|
|
 Can
you see what's happening? Can
you see what's happening?
Look in the
Address bar of each stage I mentioned above. See the address getting
longer each time a folder opens?
Where I say
something like C:\Program Files\Maxis\The Sims\GameData\UserObjects
each time there is a forward-slash symbol \ this means there is
a new folder of that name inside the previous folder.
This is actually
a set of instructions called a "Path" and works remarkably
like a postal address.
Files of all
types on your computer need to be in the exact place they were
designed to be in order to work. Sims downloads are no different,
and the way they work (or not) depends on the places they are
downloaded or moved to.
All downloads
(except houses) which you acquire from fan sites like mine will
go in a folder within your C:\Program Files\Maxis\The Sims\GameData\
folder.
You may have
noticed that there is a file called C:\Program Files\Maxis\The
Sims\Downloads\. Some creators suggest you put your fan-site
downloads in there, but this folder is actually only intended
for the free sim-day downloads from the official site, and those
you make yourself in Transmogrifier (if indeed you ever do).
Your precious
collection of Sims downloads should go in the folders as follows:
|
- .iff to
C:\Program Files\Maxis\The Sims\GameData\UserObjects (unless
it is a house file)
- .wll to
C:\Program Files\Maxis\The Sims\GameData\Walls
- .flr to
C:\Program Files\Maxis\The Sims\GameData\Floors
- .bmp to
C:\Program Files\Maxis\The Sims\GameData\Roofs
- .cmx .cfp
.skn and .bmp (when it comes with the skin files) to C:\Program
Files\Maxis\The Sims\GameData\Skins
House files
are placed as follows:
- For the
original "The Sims" game they go in: C:\Program Files\Maxis\The
Sims\UserData\Houses
- For a game
where you have one or more expansion packs they go in:
C:\Program Files\Maxis\The Sims\UserDataXX\Houses\HouseZZ
where XX is the number of the neighbourhood and ZZ is the number
of the lot.
For example,
if you want a house in Neighbourhood 3 - Lot 3, it goes into:
- C:\Program
Files\Maxis\The Sims\UserData3\Houses\House03.iff
or if you
want a house in Neighbourhood 4 - Lot 3, it goes into:
- C:\Program
Files\Maxis\The Sims\UserData4\Houses\House03.iff
The only exceptions
to these general rules are with certain hacked objects which come
with a dedicated read-me file included in the zip. It is vitally
important that you follow the installation directions within
otherwise the object will not work properly and may even crash
your game. Objects like this are usually either intended to deliberately
replace a Maxis object (such as Sir Laphelot's plant upgrades
from Simslice)
and in general, with specialised hacks like these you will be
instructed in the read-me file to put them
directly into the "ExpansionPack" folders.
|
|
|
 |
|
 Making
new folders becomes second nature for the sim downloader, yet
it is still surprising how many people have never had to do this
before embarking on sims downloading and don't know how. Until
now! Making
new folders becomes second nature for the sim downloader, yet
it is still surprising how many people have never had to do this
before embarking on sims downloading and don't know how. Until
now!
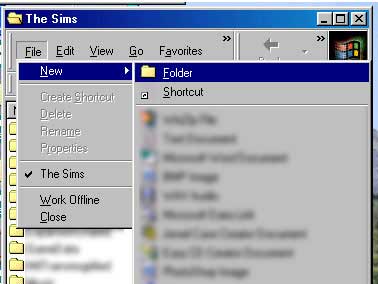
You can see
in the image on the left that I have the "The Sims"
window open, but
you can do this in any window.
Click on File,
then New, then Folder.
Give your
new folder a name which is easy to see what it contains - for
example, "SpareStuff".
The path to
this folder will then be :
C:\Program
Files\Maxis\The Sims\SpareStuff
|
|
|
You can also
make a new folder by right-clicking.
Here, I am
in My Documents, and by right-clicking anywhere in the window,
a pop-up menu gives me various options including the one I highlighted
called "New".
Mousing to
the arrow brings up another pop-up menu, and on the top is Folder.
Choosing this creates a new folder within My Documents.
Again, give
your new folder a name which is easy to see what it contains -
for example, "NewSimsStuff".
|
|
|
 |
|
 If you want to conserve your Zip (or RAR) files intact, you need
to prevent Winzip from auto-opening the download when you click
on it. But why would you want to keep your Zip files?
If you want to conserve your Zip (or RAR) files intact, you need
to prevent Winzip from auto-opening the download when you click
on it. But why would you want to keep your Zip files?
- So you
can unzip your files in batches at a time that suits you
- So you
can archive your Zip files to save space
- So you
can check them for virii all in one go
- So you
can unzip the object at a later date should the original object
become corrupt or deleted by accident
- So you
can unzip a hacked object which includes skin files into a separate
folder of its own to keep all the bits and pieces together until
you come to install it
|
|
 Wherever
possible, I use "right-click / save as" for my downloads.
However, some sites don't allow right-clicking, and while I used
to just shrug my shoulders & leave that site to visit another,
these days, Sims1 sites are all premium and so I configured my
File Download associations to ask me whether I want to open or
save the file. Wherever
possible, I use "right-click / save as" for my downloads.
However, some sites don't allow right-clicking, and while I used
to just shrug my shoulders & leave that site to visit another,
these days, Sims1 sites are all premium and so I configured my
File Download associations to ask me whether I want to open or
save the file.
I always choose
Save, and am very careful not to uncheck the box "Always
ask before opening this type of file".
This is something
you do in Windows, but you might even be able to do this within
your internet protection suite; some do offer to give you warning
pop-ups when a file is about to be downloaded.
|
|
If you want
to have your downloads confirmed in this way, here is how to do
it. In Windows 98 (and maybe later editions too, but certainly
not in XP) the procedure to stop Winzip auto-opening is:
- Start
- Run
- Type WINFILE
- File Manager
will pop-up
- Choose
File, then Associate
- Fill in
the box at the top with the file extension you wish to change
- i.e. .zip or .rar
- Scroll
to the top of the list of file types and select (None)
I feel this
is especially important for XP users as the inbuilt uncompression
function opens your zips automatically, and if you want to keep
your zips intact, you have to tell it to do so. So in XP, the
procedure to stop Winzip auto-opening is:
|
|
|
 |
|
|
 |
|
|
 |
|
|
 |
- Scroll
down till you find ZIP File and highlight (here I have
used XXE to demonstrate; you should choose ZIP File)
- Click
the Advanced button
|
 |
- Make
sure the "Confirm open after download" box is
ticked
- Repeat
this process for RAR files.
|
 |
|
|
|
 |
|
It is fairly
well documented around the community that over time, our precious
stash of objects may develop one or two corruptions.
The reason is not yet fully known, but according to the sim utility
programmer James "SimWardrobe" Sausville, the game writes
"garbage" lines to object files on saving and exiting,
and more often on items since Hot Date. Most of the time there
is no harm done, but occasionally, an object will be rendered
useless and, worse, turned into a game-crasher. Unfortunately,
these are not always detected by the otherwise splendid third-party
sim utilities I usually recommend.
The good news
is that there are two things you can do to help prevent this happening;
one I recommend and one which I personally do not, although many
other simmers do.
|
|
|
 Make
your files "read only". Make
your files "read only".
As well as
helping prevent corruption, making all your objects "read
only" is very important to the game loading time.
It is very
easy to do, and easy to undo should you need to (if you want to
alter an object with Transmogrifier, it needs to be readable first).
|
|
 Because
I only recommend putting your user-created objects into the UserObjects
folder, this is the one I will demonstrate on. Because
I only recommend putting your user-created objects into the UserObjects
folder, this is the one I will demonstrate on.
Let's take
a look at the folder of Dincer's marvellous objects.
|
|
|
 By
right-clicking on the folder, we bring up a menu of different
things we can do to it. By
right-clicking on the folder, we bring up a menu of different
things we can do to it.
Select "Properties".....
|
|
|
 ...and
up will pop a very handy window indeed. ...and
up will pop a very handy window indeed.
As you can
see, it tells us lots of things about this folder, including its
address path, the size of the folder in bytes, and the number
of files it contains (incidentally, this is too many - but I will
go into this later!).
We are going
to change an attribute of this folder. You can see in the Attributes
section here a box marked "Read-only" and there is a
little greyed-out arrow inside.
This means
that some of the 240 files (objects) are marked as Read Only but
some of them aren't. We want all of them to be marked Read Only,
so click this grey tick and.....
|
.....magically
it disappears.
Click the
empty box and a black tick appears.
Of course,
your box might have been empty, or the tick even fully black.
But I am guessing that among all your folders, you will find grey
ticks, and as greyed-out items usually mean you can't click them,
it may come as a revelation that this one you can!
Press OK and.....
|
|
 .....you
get a pop-up confirmation box, in which you get a choice of options. .....you
get a pop-up confirmation box, in which you get a choice of options.
Previous to
my having to upgrade to WinXP, I was a staunch Win98 user, and
this box was nonexistent then. If you clicked the folder and changed
its attributes, it made the folder read-only, but not the files
within. You had to do the files themselves in batches and it took
simply ages. Trying to do them all at once sometimes froze my
computer - and I had a very high-spec machine at the time.
I don't know
when this changed, but now I am an XP user it is so amazingly
quick and you are given the option to not only change folder but
the files within AND make the changes to any subfolders inside
as well. Woo! Yay!
Although you
could in theory change your entire User Objects folder this way,
this still might lead to a freeze-up if you have thousands of
objects, so while doing this one folder at a time seems tedious,
just remember that Win98 users could easily spend the best part
of an entire day doing this exercise (points at self, wearyingly).
So, click
the "Apply changes to this folder, subfolders and files"
option and press OK. After a short, very short, or very very
short while this window will disappear and your Read-only box
will have retained its black tick. Press OK and you're ready to
go onto the next folder.
You can even
change your walls and floors like this - and you will really notice
a significant difference in loading time if you do! I don't download
skins, so I am sorry but I couldn't tell you if this could be
done to your skins folder successfully or not.
|
|
|
 "FAR"
your files. "FAR"
your files.
This is something
I tried once, fell foul of, and no longer do it myself or recommend
it either. However, many other simmers do this and probably wouldn't
dream of any other way, so here is how to FAR your files.
First, you
need a FAR utility such as FARout
(free) FarX
(free) or SimEnhancer
Object Manager (pay, with 48hr free trial). While there are
a number of other FAR utilities at TSR
I would not recommend you try FarEdit as, despite
it being made by the otherwise wonderful Bil Simser, it does have
a bad habit of creating files which don't actually work. When
I got Vacation and my loading time went sky-high, I used FARout
and found it relatively simple. Thankfully, it was also simple
to use when I came to unFAR most of the objects later, though
I did lose one archive through corruption - thank goodness I had
copied the IFF files first.
So what are
FAR files and why FAR your objects?
FAR files
are used by Maxis to load all of the Maxis-made default skins
and objects quickly. A FAR file is no smaller in size (give or
take a few kb or so) than the equivalent IFF (object) files. However,
the game reads a FAR file differently to IFF files in that it
will load one FAR file many times quicker than it would loading
the individual IFF files it contains. So if you have an excessively
long loading time, it makes sense to FAR some or all of your IFF
files. Those who regularly FAR their files don't seem to report
in-game corruption of objects as much either.
There are
downsides as well as upsides to FARring your files, and this is
an updated version of a little spreadsheet of both which I made
for TSR some time back.
|
|
 Prepare
your IFF files carefully before FARring them. Ensure that
they don't conflict, are suitable for whatever expansion packs
you have or don't have, that they are categorised for wherever
you want to use them and that they are not corrupt in other
ways. Use SimExplorer to determine this last point. And last
but by no means least, ensure that you like them in your game! Prepare
your IFF files carefully before FARring them. Ensure that
they don't conflict, are suitable for whatever expansion packs
you have or don't have, that they are categorised for wherever
you want to use them and that they are not corrupt in other
ways. Use SimExplorer to determine this last point. And last
but by no means least, ensure that you like them in your game! |
|
  Make
copies of the IFF files and archive them NOW. Do not wait
until after you have FARred them. The FAR process can and
does sometimes corrupt the contents during the FAR or during
an unFAR. You might think you will never unFAR your objects,
but, as the saying goes, "never say never". There
are plenty of reasons for wanting - or needing - to unFAR
a file later on. Make
copies of the IFF files and archive them NOW. Do not wait
until after you have FARred them. The FAR process can and
does sometimes corrupt the contents during the FAR or during
an unFAR. You might think you will never unFAR your objects,
but, as the saying goes, "never say never". There
are plenty of reasons for wanting - or needing - to unFAR
a file later on. |
 If
a FAR file becomes corrupted during the FAR or unFAR process,
EVERY object within that file becomes corrupt and you cannot
retrieve any of them. Good thing you backed your IFF files
up first, isn't it? If
a FAR file becomes corrupted during the FAR or unFAR process,
EVERY object within that file becomes corrupt and you cannot
retrieve any of them. Good thing you backed your IFF files
up first, isn't it? |
|
 While While
 FAR
objects make the game load much quicker, it does not get rid
of all normal object problems which may occur. Object ID conflicts
and the "Build Mode Bug" (pre-Unleashed especially)
can happen just as often with objects in a FAR file as not. FAR
objects make the game load much quicker, it does not get rid
of all normal object problems which may occur. Object ID conflicts
and the "Build Mode Bug" (pre-Unleashed especially)
can happen just as often with objects in a FAR file as not. |
|
 If
you come across ID conflicts between a loose IFF file and
an object within a FAR file, change the IFF file (so long
as it isn't a specialised hacked object relying on other files
to work - such as .skn ones for an NPC). If
you come across ID conflicts between a loose IFF file and
an object within a FAR file, change the IFF file (so long
as it isn't a specialised hacked object relying on other files
to work - such as .skn ones for an NPC). |
 Before
FARring a whole folder of stuff, you MUST ensure that folder
does not contain another FAR file. You cannot FAR other FAR
files. Before
FARring a whole folder of stuff, you MUST ensure that folder
does not contain another FAR file. You cannot FAR other FAR
files. |
 Do
not EVER be tempted to use a FAR program to remove some of
the ugly Maxis objects from the default game objects FAR folders.
While many of those objects might be a completely and utterly
redundant waste of space (for instance, there are quite a
few objects from Livin Large I have never used in my game
nor ever intend to) they may well be the bases for objects
made by a creator which may not resemble that original base
but will not work in the game if the original base isn't there,
or (as I recently read somewhere) the game may even reference
them in some other way and if they are not there, cannot. Do
not EVER be tempted to use a FAR program to remove some of
the ugly Maxis objects from the default game objects FAR folders.
While many of those objects might be a completely and utterly
redundant waste of space (for instance, there are quite a
few objects from Livin Large I have never used in my game
nor ever intend to) they may well be the bases for objects
made by a creator which may not resemble that original base
but will not work in the game if the original base isn't there,
or (as I recently read somewhere) the game may even reference
them in some other way and if they are not there, cannot. |
|
 If
your long loading time is not too excessive (I read once that
someone's game took 45 minutes to load and 20 to unload; my
record after installing Vacation was 35 mins load and 10 mins
unload) then it would be simpler to organise in other ways.
While FARring gives the better loading time, there are other
ways to significantly lessen the loading time which are less
drastic and much easier to update should you need to, and
I will address these later on in this
page. If
your long loading time is not too excessive (I read once that
someone's game took 45 minutes to load and 20 to unload; my
record after installing Vacation was 35 mins load and 10 mins
unload) then it would be simpler to organise in other ways.
While FARring gives the better loading time, there are other
ways to significantly lessen the loading time which are less
drastic and much easier to update should you need to, and
I will address these later on in this
page. |
|
 Another
object problem which is common among those of us who indulge
in frequent downloading frenzies is getting the same object
more than once. The game really does not like this at all
if you try to load it with both installed. Unfortunately,
once you have FARred your objects, you cannot easily see the
individual file names for them, which makes identifying which
object you may have twice much harder than if they were just
"read-only". Another
object problem which is common among those of us who indulge
in frequent downloading frenzies is getting the same object
more than once. The game really does not like this at all
if you try to load it with both installed. Unfortunately,
once you have FARred your objects, you cannot easily see the
individual file names for them, which makes identifying which
object you may have twice much harder than if they were just
"read-only". |
|
|
|
 For
further reading let me suggest: For
further reading let me suggest:
|
|
|
 |
|
Such a huge
topic with such a small title.
Ask 20 simmers
how they organise their files and you will get 20 different replies.
Heck, just ask 2 simmers and you will get 2 different replies.
This is not intended to be THE definitive way of organising files,
just to show you the way I do it - and have done for the last
few years. I have so many objects it is unbelieveable, and while
I don't want all of them in my game at any one time (tiki on a
Victorian lot anyone?) I want to be able to use the ones I want
WHEN I want.
The Wuffles
Way might seem over complex on first view, but for me it is important
to keep freely cloneable objects separate from non cloneable ones
as I am primarily an object maker than game player, so I often
need to use two folders for a particular task where you may well
only need to use one. Looking at the length of this tutorial,
it also might seem very long - but don't forget, it takes longer
to show you how to do it than for you to actually do it. Also,
bear in mind that any new system gets quicker the next time you
implement it, and it really takes me no time at all these days
in organising my downloads effectively.
If you have
never organised your files before - or even if you have - I hope
you will find here some hints, tips or ideas that you will find
useful. I rarely have any problems in my game that can't be fixed
easily and quickly, and my UserObjects folder can be measured
in gb, so I must be doing something right!
If you want
to try "The Wuffles Way", I have included a framework
set of empty folders in The Bunny Wuffles Troubleshooting Kit
for you to put in your My Documents (or straight onto your desktop,
so long as it is away from the Maxis folder) and a set of empty
folders for you to put in your User Objects folder, to save you
having to make all the folders & subfolders I detail below.
Ah, don't I spoil you. No, actually I don't. If I was to REALLY
spoil you, I would have included lots of objects too. But no,
these folders are empty with the exception of the two files I
use as illustration.
|
|
|
Downloading
- how?
|
| "But Bunny,
we already know how to download, thank you." Well, yes, but
as I am going through the stages of organising in a methodical manner,
I need to start at the very beginning and in any event, I rather
fancy that I do my downloading in a different way than many simmers.
While revisiting
some well-loved sites for inspiration, I came across some downloads
from Persimmon
Grove that I don't have for some inexplicable reason. Naturally,
these are must-haves, and so I downloaded.....
|
|
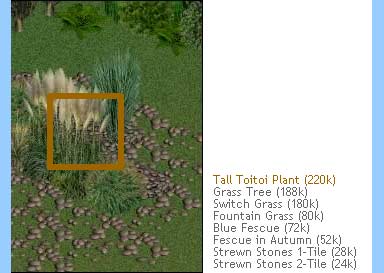
....the Tall
Toitoi Plant....
|
|
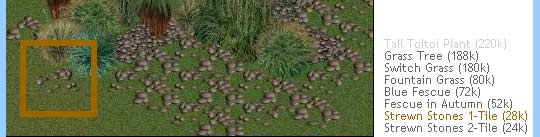 ....and
the Strewn Stones 1-Tile. ....and
the Strewn Stones 1-Tile.
We will see
more on these later as we follow their progress from website to
game.
|
|
|
I don't
unzip straight from the download. Instead, I unzip my files singly
or in batches later. Wherever possible, I use "right-click
/ save as" for my downloads so I can save the zip (or RAR)
files intact for storage.
I go into
why I do this in detail above where
I also show you how to stop Winzip from auto-opening.
So here is
my pop-up telling me I am about to download the Toitoi plant,
and I will press Save, being very careful not to touch the "Always
ask before opening.." box.
|
|
|
Downloading
- where to?
|
|
 Some
people like to put their downloads directly into their respective
folders, but if you want to even remotely organise your downloads,
this is not really a good idea. Some
people like to put their downloads directly into their respective
folders, but if you want to even remotely organise your downloads,
this is not really a good idea.
I have a master
folder outside the game folders in which I store things I don't
use in my game at any one time, and this sits inside My Documents
and is called, rather appropriately "All Sims Stuff".
This folder
itself contains three folders shown below.
|
|
 It
is generally a good idea to have a folder outside the game to
download to, and for this I use a folder in My Documents\All Sims
Stuff which I have called, appropriately, "Sims Downloads".
This makes it much easier to organise my downloads and - more
importantly - easily find any downloads which I later discover
may not agree with my game for whatever reason. It
is generally a good idea to have a folder outside the game to
download to, and for this I use a folder in My Documents\All Sims
Stuff which I have called, appropriately, "Sims Downloads".
This makes it much easier to organise my downloads and - more
importantly - easily find any downloads which I later discover
may not agree with my game for whatever reason.
You can also
see I have additional folders called "sims stuff all folders"
& "Sims zips to archive" and we will look at how
I use these a little later on.
For now, let's
take a look inside "Sims Downloads".
|
|
Firstly, I
quarantine my newest downloads in a folder of their own. Why?
Because if the game crashes, I know exactly where my latest downloads
are and won't have to scour the entire User Objects folder for
them.
So,
in my Desktop/My Documents/All Sims Stuff/Sims Downloads folder,
I have two folders called "TodayTrayCloneable" and "TodayTrayNotCloneable"
and those are where I put all new objects I haven't tested in
the game yet.
Because I
am primarily an object maker, I like to keep any free-to-clone
items separate to avoid any accidental mistakes when transmogrifying.
If you don't make objects (why
not? I make it really easy!) then you will not need to separate
them in this way. You can also see additional folders called "NonGame
to alter" & "NonGame to archive" and we will
look at how I use these in the next section.
I call these
initial folders "Today Tray" because I like to test
small batches at a time, and I generally only have a downloading
spree once daily. If for some reason I cannot check the Today
Tray files before downloading another batch on a separate date,
I make two more new folders and give them that day's date in their
title.
This sounds
rather fussy I know, but it makes the batches small (nothing worse
than opening a Today Tray to be faced with hundreds of items waiting
to be unzipped & checked) which helps no end when I find that
for some reason a zip got corrupted during download and I can
then look in my Internet History for that date to see what sites
I visited.
As Koromo
generously gave us the privilege of cloning her objects when she
announced her "retirement" (quotation marks because
I refuse to give up the hope she comes back at some stage), here
are my two downloaded Persimmon Grove zip files in my Today Tray
Cloneable folder:
|
 |
|
|
Finally, before
unzipping, as I said above, I always scan the folder of new zip
files with Norton by Right-Clicking and selecting "Scan".
I should imagine this is an option with any anti-virus software,
and I highly recommend you do this too.
|
|
 So,
in conclusion, here are my downloaded Zip files in: So,
in conclusion, here are my downloaded Zip files in:
C:\Desktop\My
Documents\All
Sims Stuff\Sims Downloads\TodayTrayCloneable
all ready
for the next stage.....
|
|

Unzipping
& testing
|
|
 As
I said above, I unzip the files either singly where I know it
is a hack which carries additional files, or in batches where
not. Sometimes, creators will put zip files inside folders inside
other zip files - if I find any of those, I unzip them as well.
If I download houses, I also unzip those separately too, so they
don't get mixed in with all the other .iff files. As
I said above, I unzip the files either singly where I know it
is a hack which carries additional files, or in batches where
not. Sometimes, creators will put zip files inside folders inside
other zip files - if I find any of those, I unzip them as well.
If I download houses, I also unzip those separately too, so they
don't get mixed in with all the other .iff files.
I use WinRAR
for unzipping, because it offers far more options when you right-click:
- Extract
Files...: see
next image below.
- Extract
Here : everything inside those two zips will end up in the
TodayTrayCloneable folder.
- Extract
each archive to separate folder : you will end up with two
folders in the TodayTrayCloneable folder with everything from
each zip in its respective folder.
- Extract
to KRiverStonesStrewn1-tile\ : you will end up with a folder
of the same name in your TodayTrayCloneable folder, containing
everything from both zips.
|
|
- Extract
files.... : Choosing this option brings up a pop-up window
with more options than you could shake several sticks at. Don't
ask me what they all mean because I have absolutely no idea.
|
|
So, now I
have batch-unzipped the folders, I now have the contents (just
two .iff files) and the original zips in my Today Tray Cloneable
folder.
|
|
Then, I move
all the zip files into the folder in All Sims Stuff called "Sims
zips to archive" and from time to time burn this folder onto
a CD-ROM or DVD-ROM. Once I am sure the burned disk works fine,
I delete the contents of this folder to start filling it up again.
|
|
|
Where applicable,
I then move any walls, floors, roofs or skin files into the appropriate
folder within C:\Program Files\Maxis\The Sims\GameData\ and any
Read-Me, picture files and other information-only files like .sif
ones into the "Sims zips to archive" folder.
 The
object .iff files should now be the only items left in my Today
Tray folders. The
object .iff files should now be the only items left in my Today
Tray folders.
Let's now
take a look at my UserObjects folder.
Despite what
you may see in other screenshots throughout my site, this is what
my UserObjects folder looks like normally. It has only three files
- the default lil one, and two folders: SafeToClone, and NotCloneable.
This is where my tested and approved objects will eventually live.
|
|
I then move
the TodayTray folders into C:\Program Files\Maxis\The Sims\GameData\UserObjects
for testing.
Here I am
only moving the one folder because I have not downloaded anything
to the other!
Before testing
in-game, I move the other two folders (SafeToClone and NotCloneable)
into My Documents/All Sims Stuff. I do put them back before checking
for ID conflicts though, otherwise that would be a pointless exercise!
|
|
I give the
full testing procedure I use in my "Downloading
Without Tears" section - "Help! A bad object is
crashing my game!" but to précis, the checks I do
are as follows:
- Sim Explorer
to ensure none are corrupted, and that I like the look of them
close up
- In-game
checks to ensure they don't disappear due to my not having MM
installed
- In-game
checks to see if they show up in the catalogue and haven't been
miscategorised in any way
- In-game
checks to see if I like the look of them in my game
- SimCat
or similar to categorise / recategorise them
- Sim Enhancer
Object Manager to check for object ID conflicts between them
and my full collection of downloads
By now, I
am able to know which category I am going to put each object in:
- Objects
I don't want in my game (freely cloneable or not)
- Objects
I do want in my game (freely cloneable or not)
|
|

What I
do with objects I don't want in my game
|
|
Once
I have "weeded out" all the objects I have decided not
to keep in my game, I put these in different categories. These
days, as sim sites are vanishing quicker than Ferrero Rocher at
the Ambassador's Party, I never delete an object completely. After
all, who knows when that lime-green-and-fuschia striped dishwasher
might come in useful?
If the object
is a new shape and it doesn't bleed badly, I keep it in a folder
called "NonGame to alter", and at some unspecified time
in the future, I will possibly recolour / retexture it for my
own game. Within this folder are two folders marked FreelyCloneable
and NonCloneable which allows me to see in an instant at some
future date whether I can put the recolour on my site or not.
It is also in this folder I put objects I want in my game but
need some fixing first; more often than not this is usually due
to a Z buffer problem, or a case of the smaller zoom measles I
detected during testing.
If the object
is indeed that lime-green-and-fuschia striped Maxis dishwasher
straight recolour, I will move it to a folder called "NonGame
to archive" where, from time to time when burning a CD of
backups, I will include this folder as well.
|
|

What I
do with objects I do want in my game
|
|
And this
is where the fun really starts!
As
I said above, regardless of any other screenshots, normally there
are only two folders in my C:\Program Files\Maxis\The Sims\GameData\UserObjects
folder; one with subfolders of freely cloneable objects and one
with subfolders of non-cloneable objects.
I have always
organised my object files alphabetically. That way, I have managed
to get NO duplicate files in my six years simming (with the sole
exception of Well Dressed Sims because when they became a paysite
they changed the names of all their old objects, including the
prefixes). Oh, and my old objects of course *blush* when I changed
my prefix to Bun.
But these
days, I also organise my objects by theme. That way, if I am in
a Tiki mood, I can just unload all my objects, load up all my
Tiki ones, and Aloha Paradise!
So how do
I do that?
Easy. I have
two sets of identical objects, arranged in two different ways.
This doesn't necessarily mean that I have duplicate objects in
each set; that would be a waste of time. Instead, let me show
you what I mean.
|
|
|
Inside
My Documents/All Sims Stuff, you will recall I have a folder called
"sims stuff all folders" and inside that are all my
theme folders waiting patiently to be called into action.
These theme
folders are also numbered according to the neighbourhood, so here you can see
I have a folder called N10 Tiki. That means my Neighbourhood 10
is - guess what - a Tiki neighbourhood.
so here you can see
I have a folder called N10 Tiki. That means my Neighbourhood 10
is - guess what - a Tiki neighbourhood.
When I want
to play in a tropical paradise, I move my folders out of User
Objects into "sims stuff all folders" and move this
N10 Tiki one into User Objects. Swapsies! And because I know my
Tiki neighbourhood is number 10, I can use EliSims to load up
Neighbourhood 10 immediately and won't have the problem of trawling
through my 99 neighbourhoods to find it.
|
|

So, let's
go!
Here (shown
in Sim
Explorer) are my two downloads from Persimmon
Grove;
the Tall Toitoi Plant.....
|
|
....and the
Strewn Stones 1-Tile.
During the
testing process, I have already decided that while I would want
both items in my everyday simming folder, if I was in a Tiki mood
I would want the Toitoi but not the grey stones.
|
|
 So,
it is a simple matter of right-clicking on the Toitoi object,
and copy/pasting it into my N10 Tiki folder.
So,
it is a simple matter of right-clicking on the Toitoi object,
and copy/pasting it into my N10 Tiki folder.
Because I
only do this AFTER I have done all the testing, I can be sure
that neither Toitoi will cause any object ID clashes with anything
else in my main UserObjects folder, because any other objects
I ID test in the future will be tested against the Toitoi which
I am about to promote to my main UserObjects folder.
I am unlikely
to change the ID of the Toitoi any more, because according to
the criteria I use for testing, I only change the ID of the newer
object in my Today Tray, and by then this Toitoi will have been
sitting in UserObjects for some time.
Because all
files in my N10 Tiki folder are all direct copies of items from
the User Objects folder, I will never use both folders in my game
at the same time so I won't get any conflicts.
Before I close
my "sims stuff all folders" folder, I make the N10 Tiki
folder Read-only.
|
|
So, what becomes
of the objects inside the TodayTrayCloneable folder? Why, they
go into my C:\Program Files\Maxis\The Sims\GameData\UserObjects
folder. Simple as that.
Well, ok.
Maybe not that simple.
|
|
 As
you have already seen, inside my User Objects folder, I have two
main folders - SafeToClone and NotCloneable. As
you have already seen, inside my User Objects folder, I have two
main folders - SafeToClone and NotCloneable.
Inside each
of those folders, I have many MANY folders with names like "game
4esf 1 4esb to 4esfcc" "game 4esf 2 4esfch to 4esflau"
etc. The name tells me the contents - for instance game 4esf
1 4esb to 4esfcc is:
- game:
this folder is for my everyday gaming
- 4esf:
the files all came from 4EverSimFantasy
- 1:
this is folder #1
- 4esb
to 4esfcc: the files inside begin and end with those filenames
|
|
So why do
I have three folders devoted to 4es? Because to keep my game running
smoothly and quickly, I ensure that no object folder has more
than 200 files in it (in fact I tend to stop at 195). I talk further
about this below.
In my SafeToClone
folder is a file marked "game K Persimmon Grove" and
it is to that folder I will move the contents of my TodayTrayCloneable
folder. Before I close my SafeToClone folder, I will make the
"game K Persimmon Grove" folder Read-only.
Now my TodayTray
folders are empty again, I move them back to their home in the
Sims Downloads folder which you will recall itself lives inside
My Documents.
And that's
all there is to it!
In all my
thousands of downloads, I find it incredibly easy to find "that"
certain object I am ever looking for, because I generally have
a good idea who's work it is, and can easily go to that folder
or set of folders because of the naming system I use, and then
use Sim Explorer to find it. I never have any problems when I
want to play any of my theme neighbourhoods after a break, and
this system allows me to have fairly easily organised every single
sims object I have ever downloaded in my six years of simming,
and continue to organise the many more which are being made now
and those hopefully in the future.
As you will
no doubt have guessed, I cleaned out my folders to show you these
screenshots - I do have a lot more folders tucked away than just
the one or two you have seen. I just didn't want to make the task
of following each step too daunting for you!
|
|
|
 |
|
Once upon
a time in Simland, there was no real problem with the length of
time the game would load, even if you had all the objects, skins,
walls & floors there were to be had. Then along came Sims
Vacation. Why I do not know, but for some reason this expansion
made a huge difference in loading times, and all of a sudden the
forums were full of queries about what we could do to alleviate
this.
I remember
reading that someone's game took 45 minutes to load and 20 to
unload; that made my personal record of just over 35 mins load
and 10 mins unload seem paltry in comparison. Many suggestions
were made as to what we could do in the time between loading the
game and actually playing; these usually involved much-neglected
housework, making coffee & a sandwich, popping out to McDonalds;
that kind of thing.
But by far,
the best suggestions involved the following, and these still hold
true today.
|
|
|
Having
a large number of downloads slows things down.
Yes, this
sounds obvious, but how many of you thought I just meant objects?
You may be surprised to find that having a large number of downloaded
walls and floors will also slow your game loading time measurably.
Periodically, use SimExplorer to weed out those walls and floors
you simply don't use and I guarantee you will find a significant
difference afterwards. I am given to believe that skins load in
a different way and don't affect loading times at all but having
no downloaded skins in my game at this time, I couldn't vouch
for this personally.
|
|
|
A
folder of 199 files will load much quicker than one containing
201.
While I am
both a Mac and a PC user and therefore look to Mr Jobs and Mr
Gates with equal reverence, I am sure I am not incurring his wrath
if I tell you that Mr Gates' otherwise excellent Windows application
in conjunction with The Sims really does not like large folders.
While a folder can actually contain as many items as you like,
for optimum performance and stability less than 200 is essential;
any more and it makes a considerable difference in game loading
length. This is obviously very important if you have lots of objects!
One of our dear object hackers found this out (P8ntmstrG? Cooptwin?
can't find the original posts now but bless you anyway wherever
you are) some considerable time ago and tests done separately
at both TSR and N99 proved this true - and that it still holds
true today.
While you
can have subfolders in your objects, walls & floors folders,
you can't put subfolders in the skins folder as they have to remain
loose in order to work properly.
|
|
|
Convert
your files into FAR or "Read Only".
A "read
only" file takes less time to load up than an untreated file,
so the more you have converted to "read only" the quicker
the game will load. Whether you decide to FAR or not, you should
always make your IFF files "read only" as the added
advantage is that the game can and does corrupt IFF files from
time to time, and by making them "read only" you reduce
that chance to almost zero.
|
|
|
Forego
the merry loading song.
While it is
fun (at first) to let the little messages scroll across the screen
while merrily playing the loading theme, if you minimise the screen
once it has started loading, the game will load considerably faster.
To minimise (or maximise again), press Alt + Tab. You can also
minimise during play but be warned - sometimes the cursor disappears
if you do this too often.
|
|
|
Defragment
often.
Yes, defragging
can make a huge difference, especially if like me you move files
and folders about often. Look in your PC's user guide for specific
instructions on defragmenting your system.
|
|
|
Have
nothing running in the background.
Too many programs
or utilities running at the same time will slow your game loading
down considerably. Also, having a lot of programs on "stand
by" in your Start-up folder can make a difference. Look in
your PC's user guide for specific instructions on removing items
from the Start-up folder.
|
|
|
|
|